Managing Groups
Movable Type Enterprise Solution provides a method for creating and managing groups within the Movable Type system. You must have been granted permission to Manage Groups by a Movable Type system administrator in order to perform these actions.
An Overview of Groups
A group is a collection of users which can be managed together as if they were one user. Groups can be granted system-level permissions or roles on blogs. Groups can be enabled and disabled.
Groups and their members can also be synchronized on a routine basis with an external LDAP directory.
When a permission is granted to a group, each member of that group has the role granted to the group on the specified blog. Simply by adding a user to, for example, the Marketing group, they will automatically get access to all of the blogs the Marketing group has permission to access and manage.
You may also want to create a System Administrators group and grant it the System Administrator permission, allowing simple addition and subtraction of users who have that all-powerful status.
Creating a Group
Note: This feature is only available to System Administrators but is not available under external user/group management.
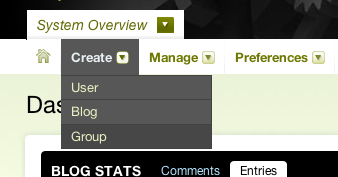
Click the System Overview link at the top of the page. This will take you to the System Dashboard.
From the Create menu select “Create Group”.
Enter the new group profile information.
Click on Save Changes. The group is created, and a confirmation message will be displayed.


Deleting a Group
Note: This feature is only available to System Administrators but is not available under external user/group management.
Click the System Overview link at the top of the screen. This will take you to the System Dashboard.
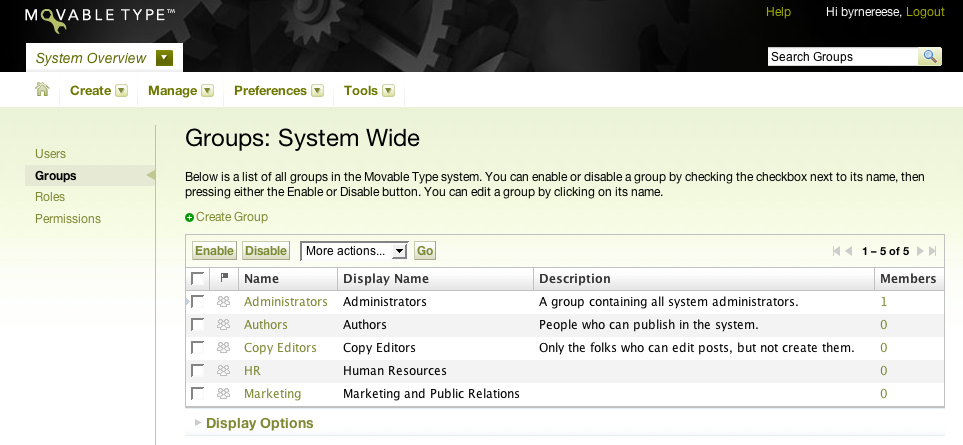
From the “Manage” menu select “Groups.” A table will be displayed of all the groups in the system.
Select the group to delete, click the check box in the group row.
Click the Delete button and click OK to confirm the deletion. The group is removed and a confirmation message is displayed.
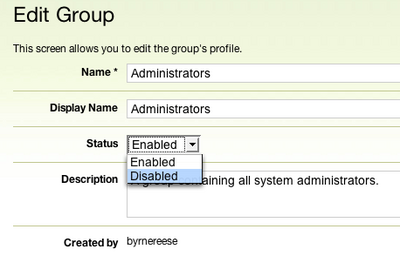
Editing a Group
Note: This feature is only available to System Administrators but is not available under external user/group management.
Click the System Overview link at the top of the screen. This will take you to the System Dashboard.
From the “Manage” menu select “Groups.” A table will be displayed of all the groups in the system.
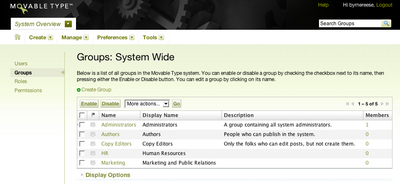
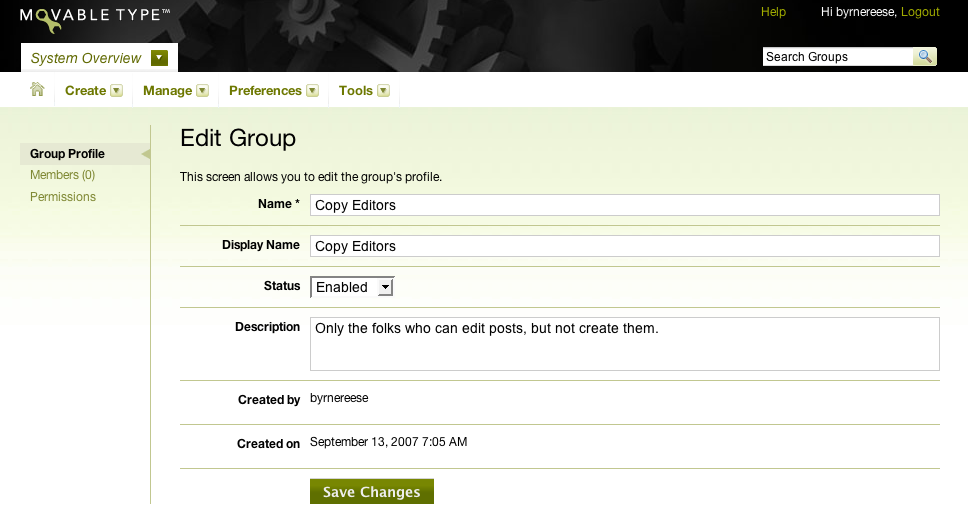
Click on the name of the group you wish to edit from the table. You will be taken to a form which will allow you to edit the properties of the group.
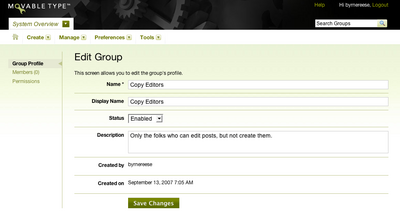
Click Save Changes. The Group Profile page and a confirmation message is displayed.
Adding and Removing Members to a Group
Note: This feature is only available to System Administrators but is not available under external user/group management.
Click the System Overview link at the top of the screen. This will take you to the System Dashboard.
From the “Manage” menu select “Groups.” A table will be displayed of all the groups in the system.
Click on the name of the group you wish to add or remove member to or from.
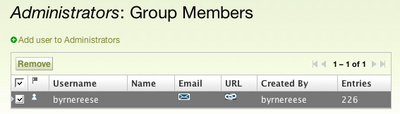
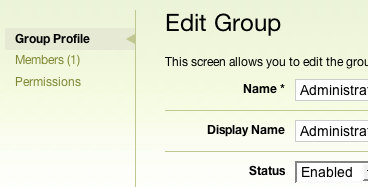
In the left hand navigation, click on the “Members” link.

To add a user click the “Add User to Group Name” link. From the dialog that appears, select the users you wish to add to the group and click the Continue button.
To remove a user from a group, select the user or users you wish to remove from the group and click the remove button.

Enabling and Disabling Users and Groups
Disabling a user prevents login by that user but preserves all content and associations. This is perfect for not only retiring a user but also temporarily deactivating them if the need arises. On the other hand, disabling a group disables the associations (role/blog) of that group (inherited by its members) but preserves them for the future. Both functions are available only to System Administrators and are completely reversible.
Click the System Overview link at the top of the screen. This will take you to the System Dashboard.
From the “Manage” menu select “Groups.” A table will be displayed of all the groups in the system.
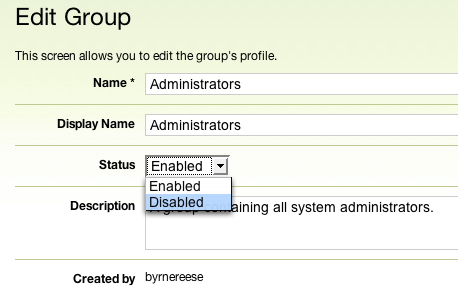
Click on the name of the group you wish to enable/disable.
From the Group Profile page, change the status of the group from the Status pull down menu and click “Save Changes.”
A status message will appear confirming the transaction.