Managing Entries/Pages
Any user may edit or delete entries/pages that they themselves have created. Additionally, with the Edit all entries permission (assigned by a System Administrator), a user can edit any entries in the blog for which they have this permission.
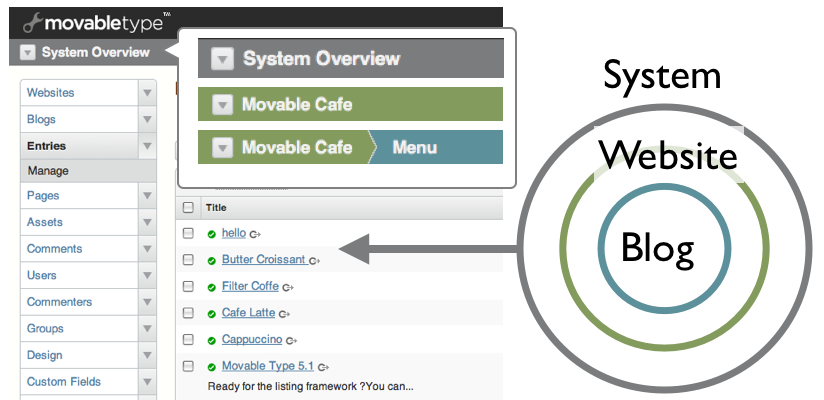
To manage entries, Please select [Entries] > [Manage] in the Side Menu. To manage pages, select [Pages] > [Manage] in the Side Menu.
You can also manage entries(pages) for all blogs on the system. To do this, select [System Overview] from the navigation pull-down menu. When you choose the website, all the entries within the website’s children blogs are displayed.
Display Options 
The list can be customized to help you find and manage your contents. [Display Options] at the right top of the list gives you options to add/remove columns and to change the number of rows.
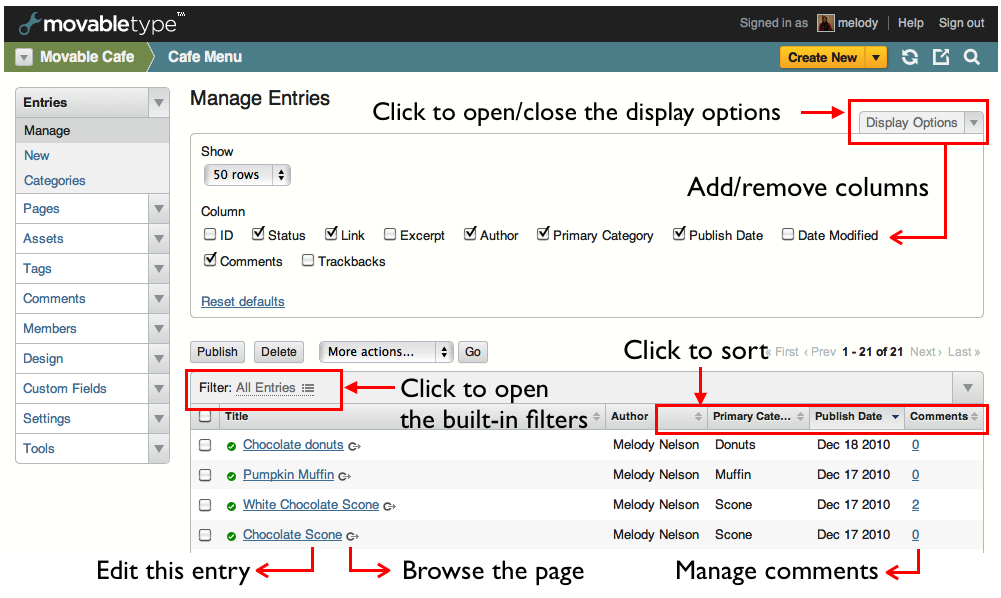
You can sort an entire list by clicking a column header.
Filtering the list
You can filter the list by any column. To open the filter pane, click the arrow in the upper-right corner of the list. Then select filter item from the pull-down menu to specify the date, number or string. You can select multiple items and combine them. Click [Apply] button to filter the list, and click [Save] button to save the current filter.

Quick filters
Most of the listing screens have their built-in filters. For example, “Manage Entries” has filters such as “Unpublished Entries” or “Entries Commented in the Last 7 Days”. To select built-in filters, click the current filter name. A filter dialog will pop-up.
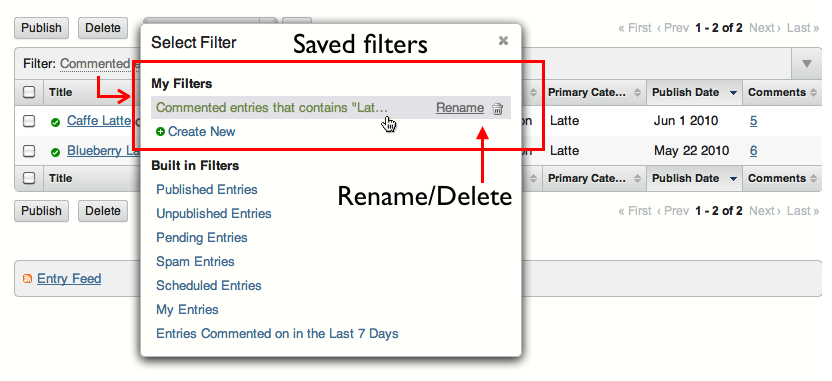
The saved filter will appear under “My Filters” in the filter dialog, and you can re-apply the filter by clicking it. To delete the saved filters, click the trash icon or go to [System Overview] and select [Filters] in the side menu.
Additionally, you can subscribe to an Atom feed of new entries created in the system by clicking on the “Entries Feed” link at the bottom of the list.
Managing entries/pages in bulk
To manage multiple entries in bulk, select the entries you wish to edit by clicking their checkboxes. Click [Publish] or [Delete] buttons, or you can select more actions from the pull-down menu. You can:
- Unpublish Entries/Pages
- Add/Remove Tags
- Batch Edit Entries/Pages
Selecting all
When you select all the items from the list, Movable Type gives you the option to select the whole item from the list, not only the items that are displayed in the current page. This is useful, for example, if you want to delete all the comments that contain spam keywords.

The listing framework
These new listing features are built upon the common listing framework. If you are a plugin developer, the following developer guide might be interesting.
All the features are available in the following screens.
- Activity Logs
- Manage Assets
- Manage Address Book
- Manage Blogs
- Manage Comments
- Manage Commenters
- Manage Custom Fields
- Manage Entries
- Manage Groups (Movable Type Advanced)
- Manage Group Members (Movable Type Advanced)
- Manage Members
- Manage Pages
- Manage Permissions
- Manage Roles
- Manage Tags
- Manage TrackBacks
- Manage Users
- Manage Websites