Setting up “Eiger”
What is "Eiger"?
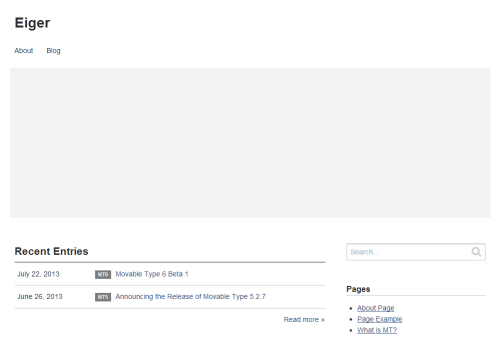
[Eiger] is a responsive web design theme geared toward corporate sites with a Media Query (CSS) base that provides multi-device compatibility. Basic Movable Type functions also give users the ability to customize certain design aspects, such as replacing the default header background image and title display, as well as customizing links included in the navigation menu, copyright information, and the favicon and og:image. Eiger Functions
The Eiger theme includes the following:
- A default blog header title, replaceable with custom logo image
- A default header background, replaceable with custom background image
- A default favicon, replaceable using the item upload function
- The ability to add specific web pages to site navigation
- The option of customizing og:image thumbnail images
- The ability to customize the number of the most recent blog entries displayed on the front page, with the default being 10 entries
- A default banner and text provided on the right hand side of the top page, replaceable with custom image
- Four pre-installed sample widgets
- Bread crumb navigation (excluding on the home page, error page and search results page)
About Media Queries
Media Queries is a CSS3 module and is recommended as the standard for web page rendering by the World Wide Web Consortium (W3C). It automatically adjusts page size, CSS and page layout to best fit the device used to access the page. Certain layout changes will be made by default depending on the following conditions:
- Page width over 930 px: 2 column layout, menu displayed in full
- Page width over 700 px but under 930 px: 1 column layout, menu displayed in header only, some elements (such as the search function) are centered
- Page width under 700 px: 1 column layout, menu displayed in header only, some elements (such as the search function) are centered, grid layouts unsupported.
Customizing Eiger
Certain aspects of Eiger can be customized, such as the blog title and background image in the header, as well as the links included in the main navigation menu.
Customizing the Default Blog Title Display
By default, the name of the blog will be displayed as text in the blog header. This text can be replaced with an image of the user's choosing, such as a logo.
- From the left hand menu, click [Assets] and then [New].
- Click [Select File] and upload the desired image. (Recommended image width: at least 200 px.)
- Select the uploaded image.
- Enter @SITE_LOGO into the [Tags] field and then click the [Save Changes] button at the bottom of the page.
Once the page has been rebuilt, the uploaded image should be displayed.

Customizing the Default Blog Header Background
By default, the header background is set to a grey color. This background can be changed to an image of the user's choosing.
- From the left hand menu, click on [Assets] and then [New].
- Click [Select File] and upload the desired image.
- Select the uploaded image.
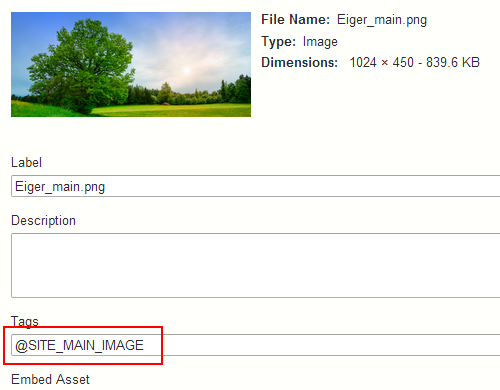
- Enter @SITE_MAIN_IMAGE into the [Tags] field and then click the [Save Changes] button at the bottom of the page.
Once the page has been rebuilt, the uploaded image should be displayed.
Adding a Web Page Link to the Main Navigation
It is possible to add a specific web page link to the blog's main navigation.
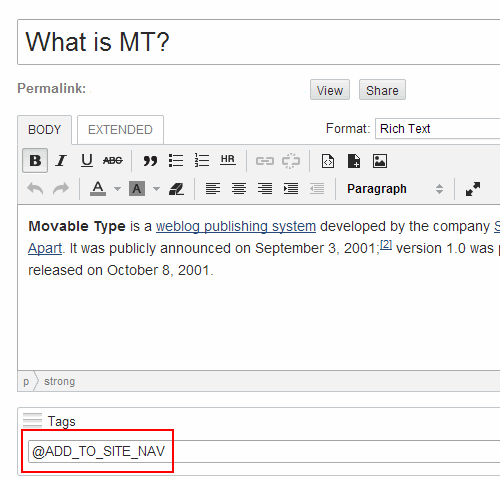
- From the left hand menu, click [Pages] and then [New].
- After typing a title and summary, enter @ADD_TO_SITE_NAV into the [Tag] field and click the [Save Changes] button at the bottom of the screen. Then, rebuild the page.
When creating a blog or website, it's generally good practice to create an [about page] giving a general idea of what the blog or site is about and some background on the creator. Follow the steps below to add an [about page] link to the site navigation.
- Move to the desired blog from the upper left hand menu on the user dashboard.
- From the left hand menu, click [Pages] and then [New].
- After typing a title and summary, enter @ABOUT_PAGE into the [Tags] field and click the [Save Changes] button at the bottom of the screen. Then, rebuild the page.
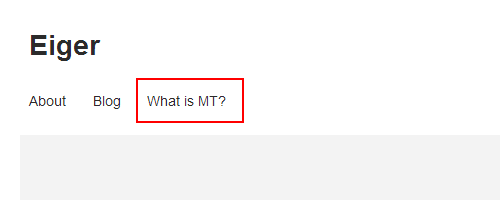
Then main navigation will be changed.
Setting an og:image
The og:image is used when linking blog entries on social media sites like Facebook or LinkedIn. By setting an og:image to a page or entry, the specified image will be used as a thumbnail image alongside the text link.
- Move to the desired blog from the upper left hand menu on the user dashboard.
- From the left hand menu, click [Pages] and then[New].
- Click [Select File] and upload the desired image.
- Enter @SITE_ICON into the uploaded image [Tags] field and click the [Save Changes] button at the bottom of the screen. Then, rebuild the page.
Customizing the Side Banner
By default, a simple banner image is displayed on the right side of the top page. This banner is accessible by clicking [Design] => [Widgets] => [Sample Widget 03]. The banner image can be changed by replacing the [Sample Widget 03] image with an image of your chosing.
Using the Sample Widgets
Aside from [Sample Widget 01] and [Sample Widget 03], both of which are displayed on the top page, there are two other pre-installed widgets available for use. Click on [Design] and then [Widgets] to access the widget screen and either replace or use widgets.
Other Functions
There are several other standard functions available with the Eiger theme.
Changing the Copyright Information
It is possible to change the copyright information displayed at the bottom of each page.
- Move to the desired blog from the upper left hand menu on the user dashboard.
- From the left hand menu, click [Design] and then [Templates].
- Open the footer template module editor. The first line of text is the copyright information and can be replaced or edited by the user.
- Once all edits are complete, click the [Save Changes] button at the bottom of the screen and then rebuild the page.
Setting a Favicon Image
A favicon, also known as a shortcut icon, is a small graphic, usually 16 px by 16 px, that is displayed in the browser's address bar or next to the page address in the bookmark list. Follow the steps below to set a customized favicon to your blog.
- Move to the desired blog from the upper left hand menu on the user dashboard.
- From the left hand menu, click [Assets] and then [New].
- Click [Slect File] and then upload the desired favicon file (either .ico or .png).
- Select the uploaded favicon file and then enter @SITE_FAVICON into the [Tags] field.
- Click the [Save Changes] button at the bottom of the screen and then rebuild the page.