URL Email Notifications for Blog Entries and Web Pages
It is possible to send URL links via email informing readers of new or updated pages or blog entries.
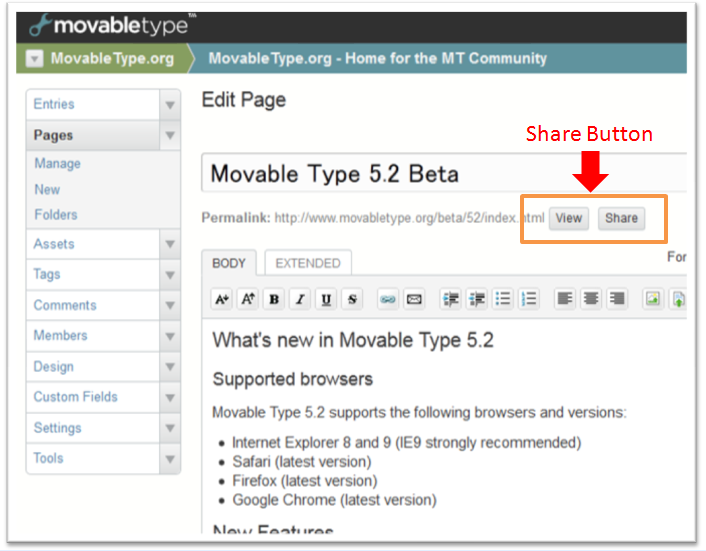
- First, go to the editing screen for a previously published web page or blog entry.
- Click the "Share" button, located under the title input area.
- The notification options window will open.
- If you want to send notifications to all addresses listed in your address book, check the box next to "All addresses from Address Book".
- If there are addresses not listed in your address book that you wish to send notifications to, you can add them manually in the space provided.
- You can add an optional message to accompany the notification.
- Select any other content you wish to send with the notification email, otherwise, only the entry or page title and URL will be sent.
Sending Notifications to Additional Contacts
If you wish to send notifications to additional contacts via BCC, you will need to add the following to the mt-config.cgi file:
EmailNotificationBcc 1
After setting up EmailNotificationBcc, certain options will become available. Option details are listed below and have different effects whether they are turned on or off.
| Check Box | EmailNotificationBcc | Additional Contacts | Registered Contacts |
|---|---|---|---|
| off | 1 | do not send | send as BCC |
| on | 1 | send as BCC | do not send |
| off | do not send | send directly to each contact, one by one | |
| on | send directly to each contact, one by one | do not send |
Customizing Notifications
It is possible to create a custom notification template. From the system template list, choose the "New entry notification" mail template and edit the contents as you wish.
Managing Your Address Book
A different notification address book can be created for every web site and blog.
If you want to use the address book function with Movable Type 5, you must first set EnableAddressBook 1 in the configuration file (mt-config.cgi).
Adding Contacts
- From the side menu, click on "Address Book" located under "Tools".
- Choose "create new contact info".
- Enter the contact's email address. You also have the option of adding a website URL.
Downloading the Address Book
By clicking on the "Download Address Book (CSV)" short cut widget, all registered contacts will be downloaded from the address book as a CSV file.
Deleting Contacts
Choose the name of the contact you want to delete from the address book and then click the "Delete" button.